Tuesday 30 August 2011

More filling

Back to filling after being like a kid in a sweetshop when I got my brake parts in haha, was a good break from filler on............. filler off.............. filler on.................


Now that Ive got my arse in gear and created this blog today, back to the filling!!


Finally a rear brake!

Sorted the rear brake out which was the biggest headache so far, the exhaust is really close to the frame at the best of times but with adding a rearset where I wanted them made matters worse, the brake is pulled from the opposite side of the pedal which also makes it tricky. After spotting the cable on BBsparkys rearset kit (cheers for the pics mate) everything in my head aligned and clicked into place lol. So I managed to persuade Martin at Burwins to sell me just the cable and drum mount, for £18, then I managed to source a Tarozzi rearset off eBay for a whopping 99p plus P&P, its ideal as you can adjust the pedal height and cable pull angle to suit, its actually a left hand one but they are universal. All I had to do is make a cable stay on on the pedal side using 20mm box with a 6.5mm hole in it for the cable stay and a 10mm hole for the cable to go through, then slotted so you can get pass the cable through, works a treat and I welded it so that it also acts as a stop so the pedal wont flip backwards. The only other mod was on the drum side I felt that the spring isnt strong enough to release the brake so I added an extra one off a Bantam cable I had kicking around and now it snaps back nicely. Anyone thats had to do this on an MZ will appreciate what a ball ache it is lol, anyway loads of pics taken to help anyone else out, cause there's a couple of people I know who's waiting to do the same, if you need anymore give us a shout

Has anyone else got a Tarozzi rearset lying around I could buy off them? Would be a great help, you can buy a pair new for £99 and new spares to build one up from scratch but this is a budget build so trying to do as cheap as poss, cheers


Starting the filling

Not much to report apart from being at the paint stage which cant be a bad thing apart from filler on filler off filler on filler..........

Managed to gain .000000025 mph extra by drilling the front mudguard lol


Not bad considering it started off as 3 crusty pieces


Steering modding

Further racing modifications just completed this weekend, Ive dropped the suspension in the front forks, this has steepened the steering angle giving faster steering, to do this I got an old bottom yolk, machined the stem out of it, made a spacer to go underneath it so it rests on the top bearing without galling on the frame. It gives me four benefits 1: Faster steering 2: It gives extra clamping on the stantions as the standard is two bolts at on the bottom yolk, this gives me 4 3: It stiffens the front springs up as the top bolts now push them down 20mm 4: It neatens the top yolk up after using clip ons so win win all round makes a change lol I just need to mill a bit of the top where the stem nut goes tonight and thats another mod ticked off

Notice on the bottom pic the gap between the headlamp brackets and the bottom yolk, this is how much it lowers it, the stance looks miles better, if you look through the build pics you will notice the front sits a bit higher than the back, its now nose down arse up!!

Also notice on the second pic the extra bolting on the stantions as the old top yolk was held in by the stantion nuts, this stiffens the front up no end, ill also add a brace by the mudguard later

Before shot old top yolk:-


After:-


Engine rebuild

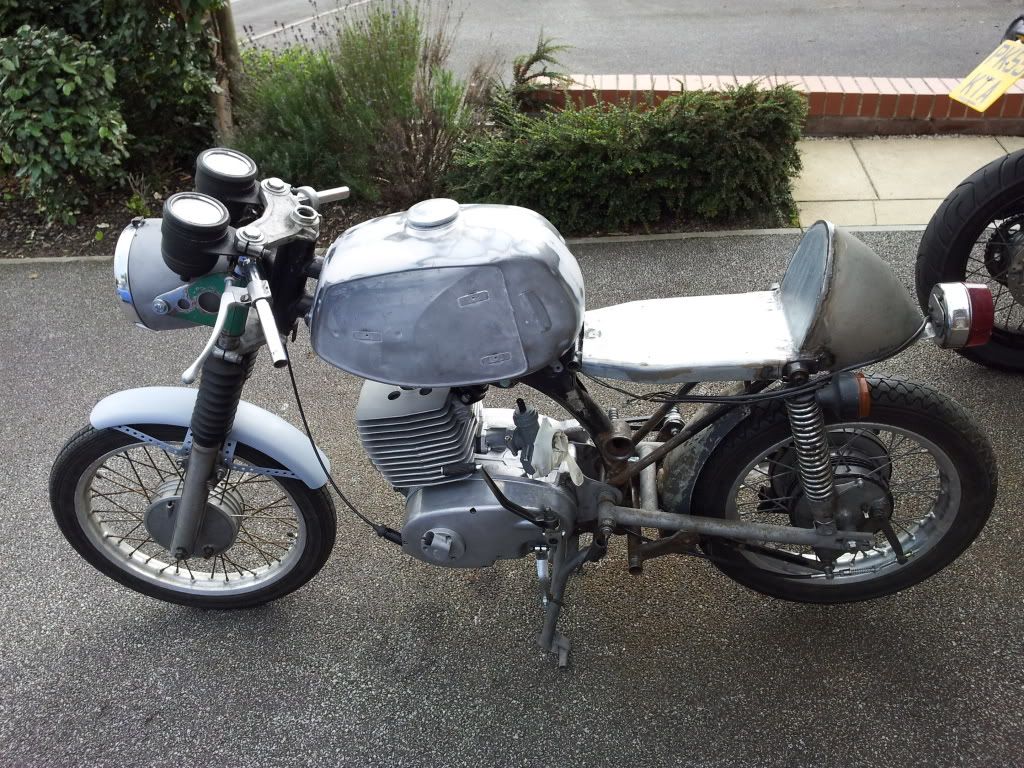
Alright been too busy beavering in my hole to do any updates lol. I tried to get an unpainted running bike down to a rod meet we have every year for the volksrods site I help run, but unfortunately all plans didnt work out so Ive started stripping down again to further modify and paint

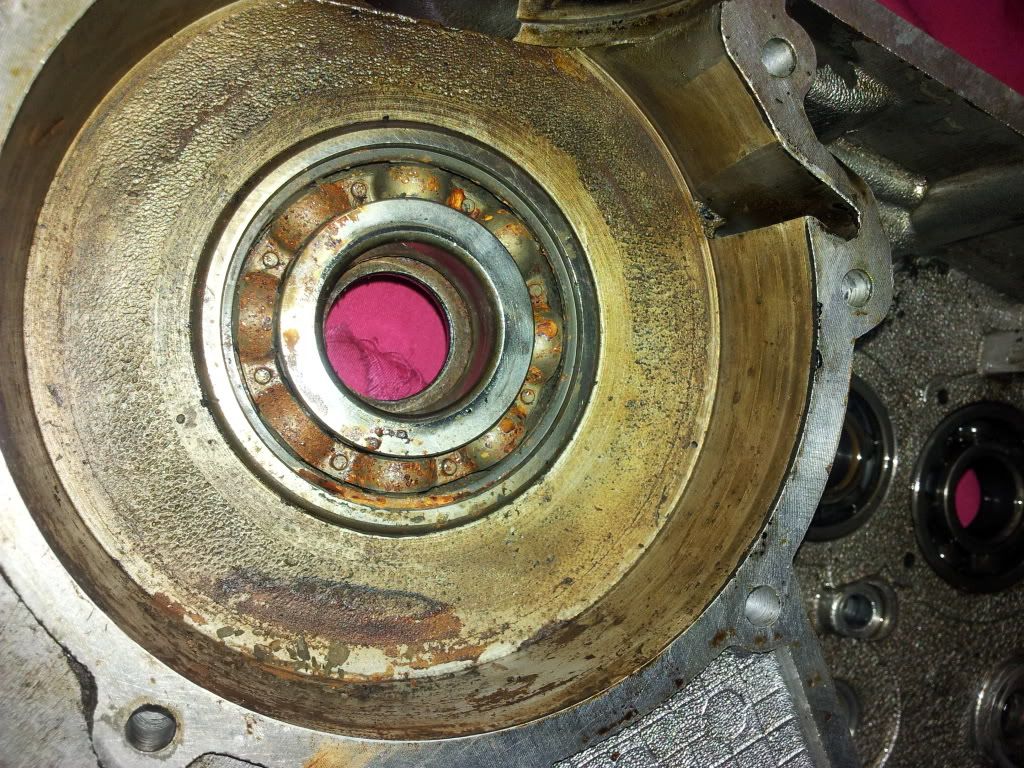
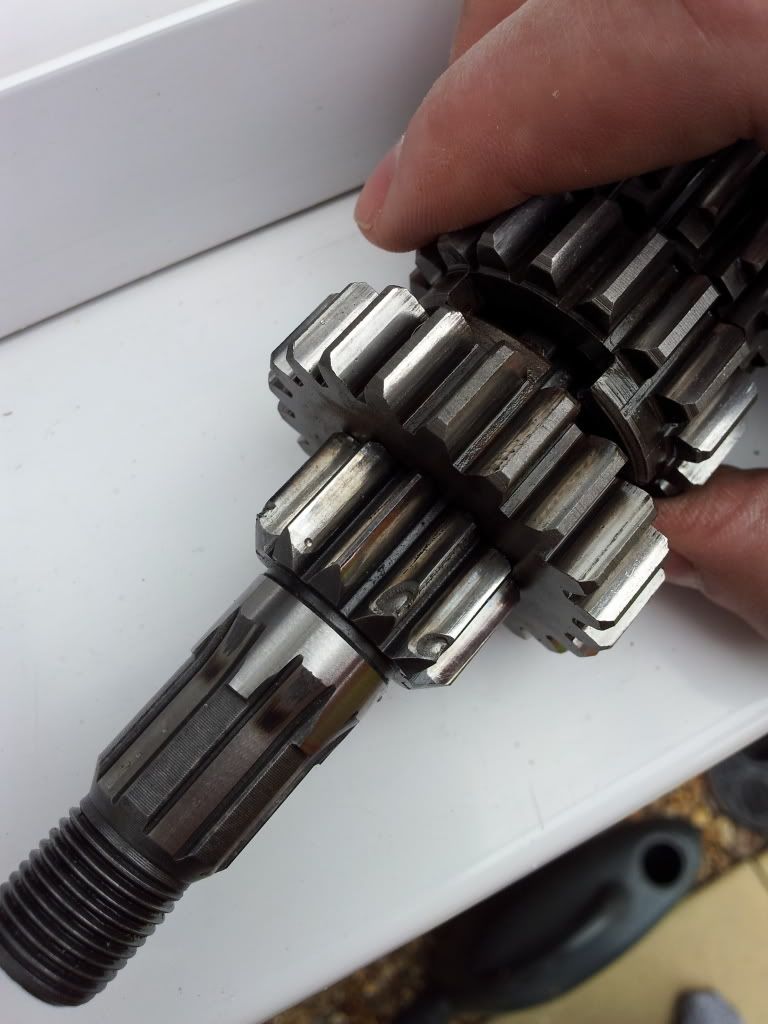
The reason I didnt get to go was because I went to kick it over one day and the bloody thing felt like it was seized, I already stripped the top end apart and all was hunky dory so after splitting the crankcase my worst suspicions were confirmed, main bearings had seized, see below pic, so I spent a week getting the bits together to split the crank, new conrod and bearings all round, gearbox etc, find a new secondary shaft as first gear secondary had chipped probably due to a backfire when kicking over etc etc then all stitch back together again :-

Nice!


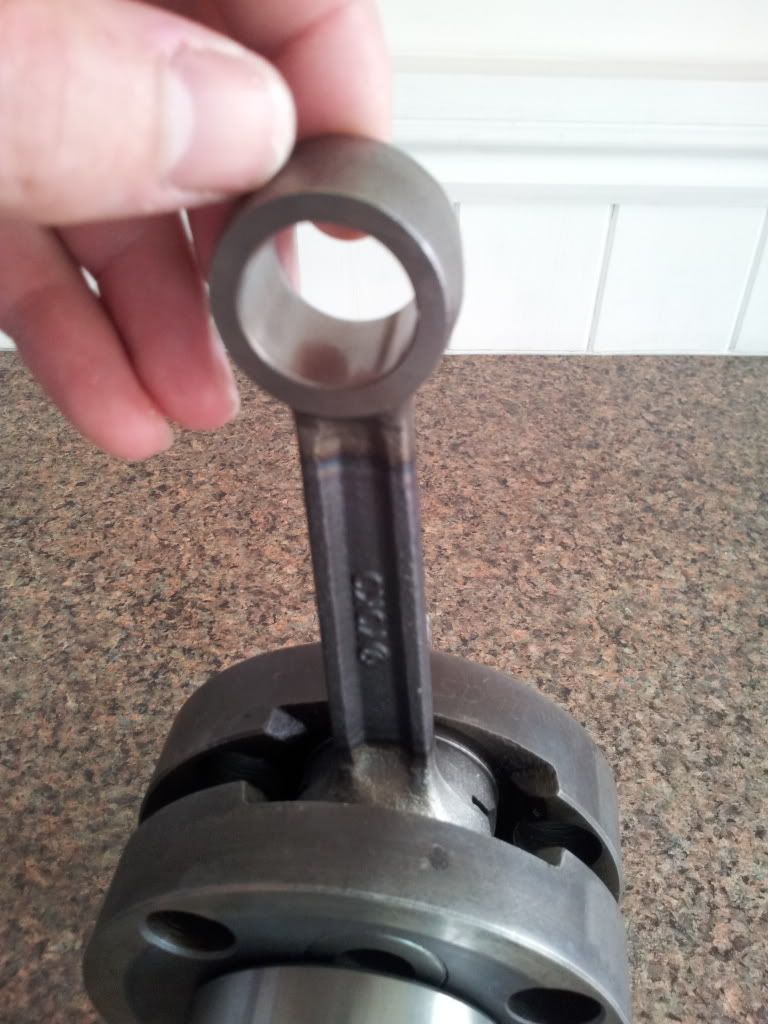
New conrod seals and big/little end bearing done by Martin proprietor at Burwins London


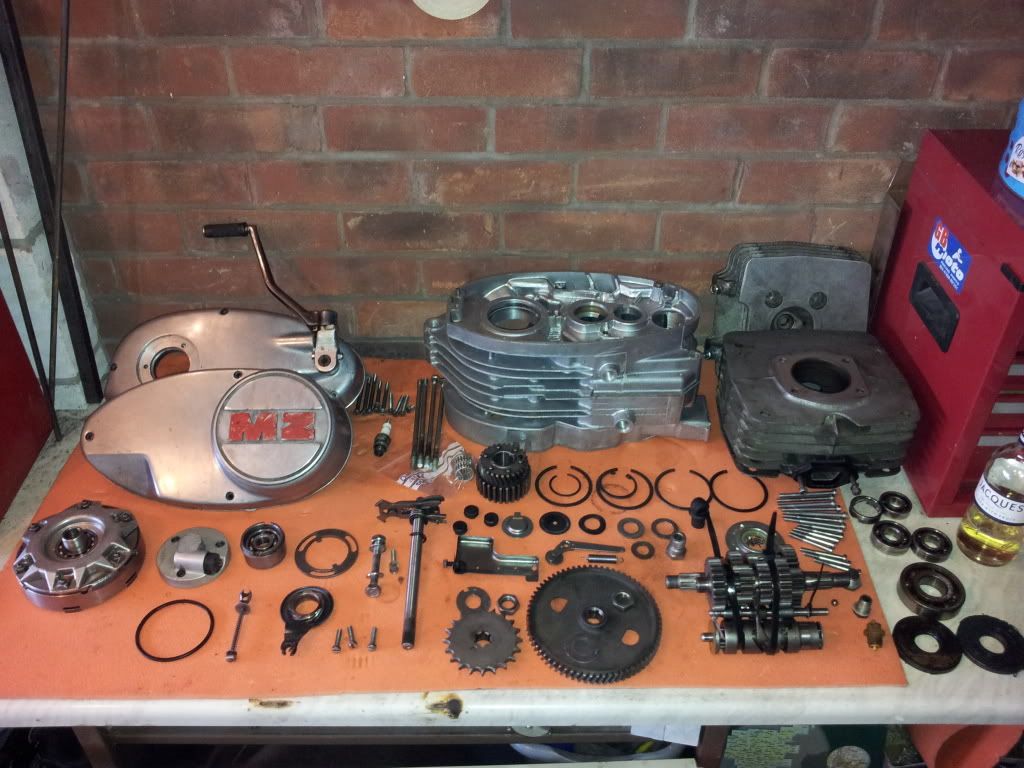
All cleaned up ready to rebuild


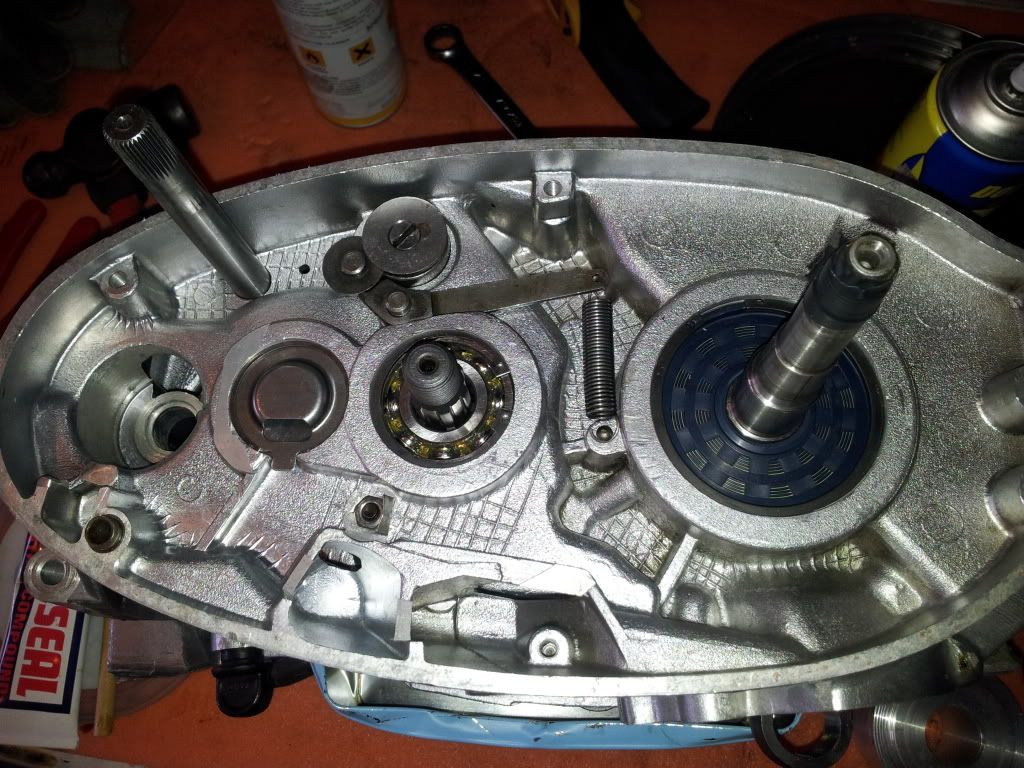
Crankcase internals with new bearings/seals, I use Wellseal as a gasket sealer, the best ever sealer Ive used, you can also build it up in layers if youve got a dodgy joit, just leave each layer to dry tacky before adding another layer on (top tip of the day haha)


Cases heated up to 100 degrees C to drop the bearings in ready, waited till the missus was out and cranked the oven up, first half done waiting for other case to heat up


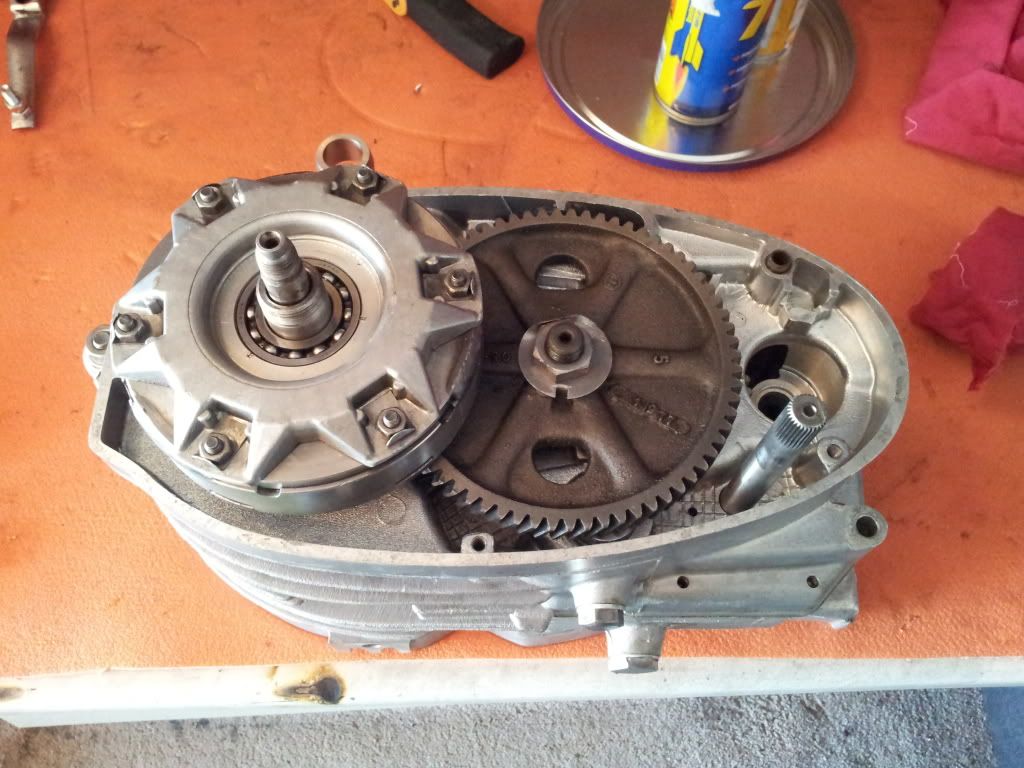
Clutch and drive gears going in (spot the wellseal box in the background, dont use any other sealer)


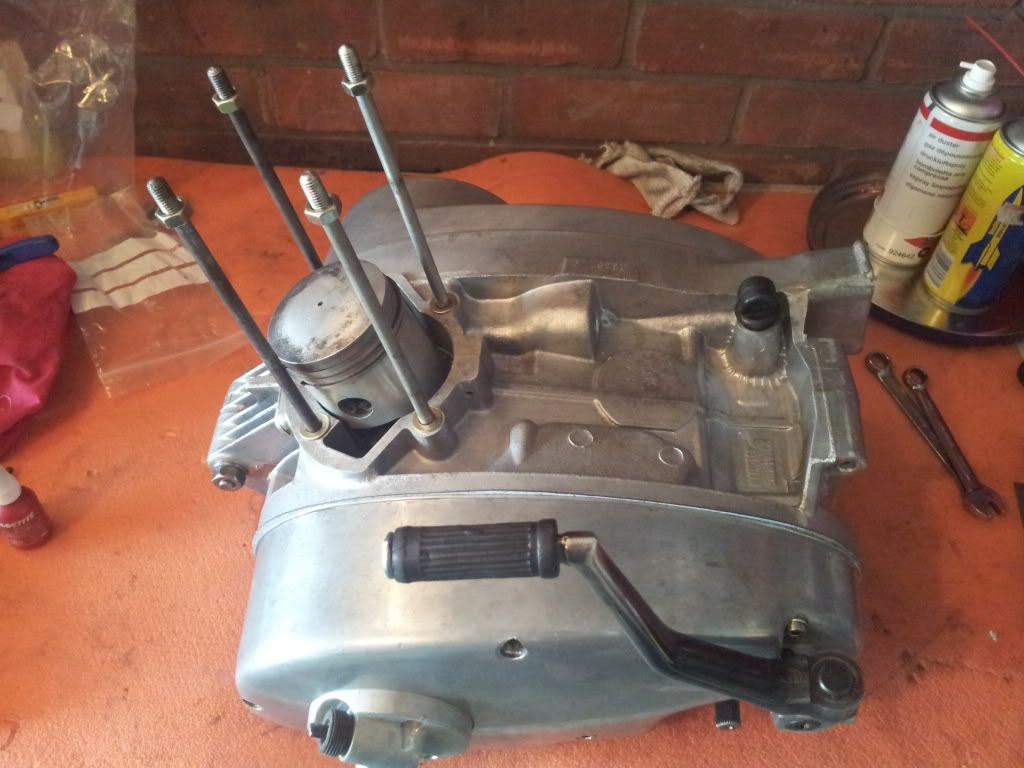
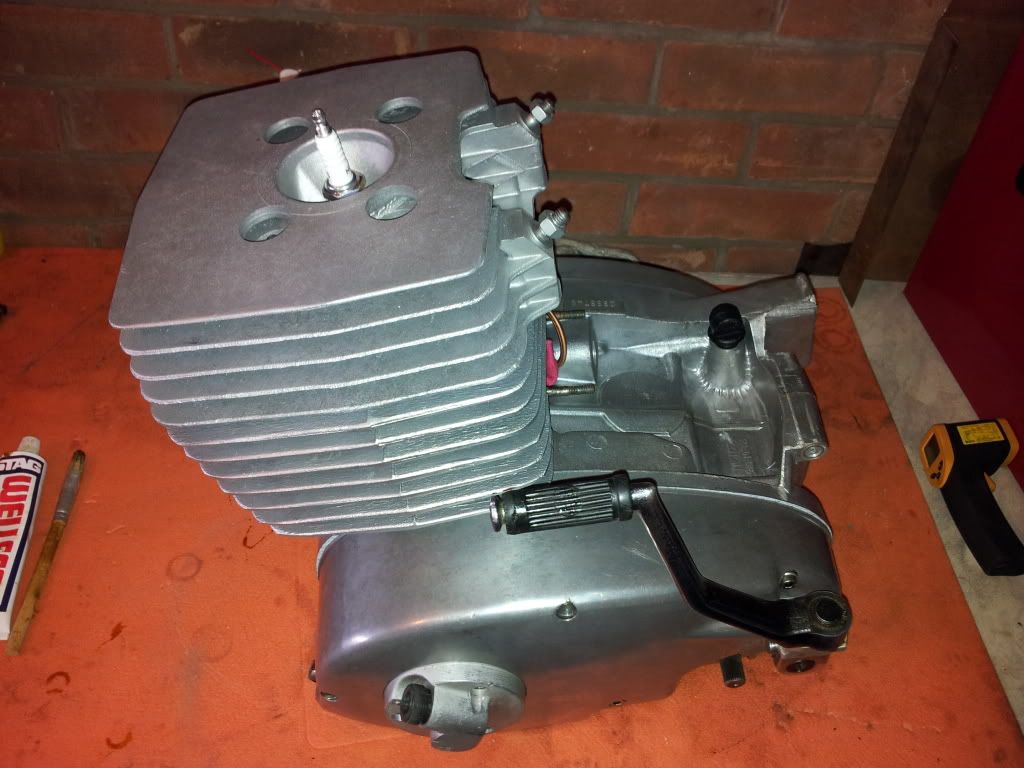
Ready for the barrel and head to be beadblasted on the nightshift 
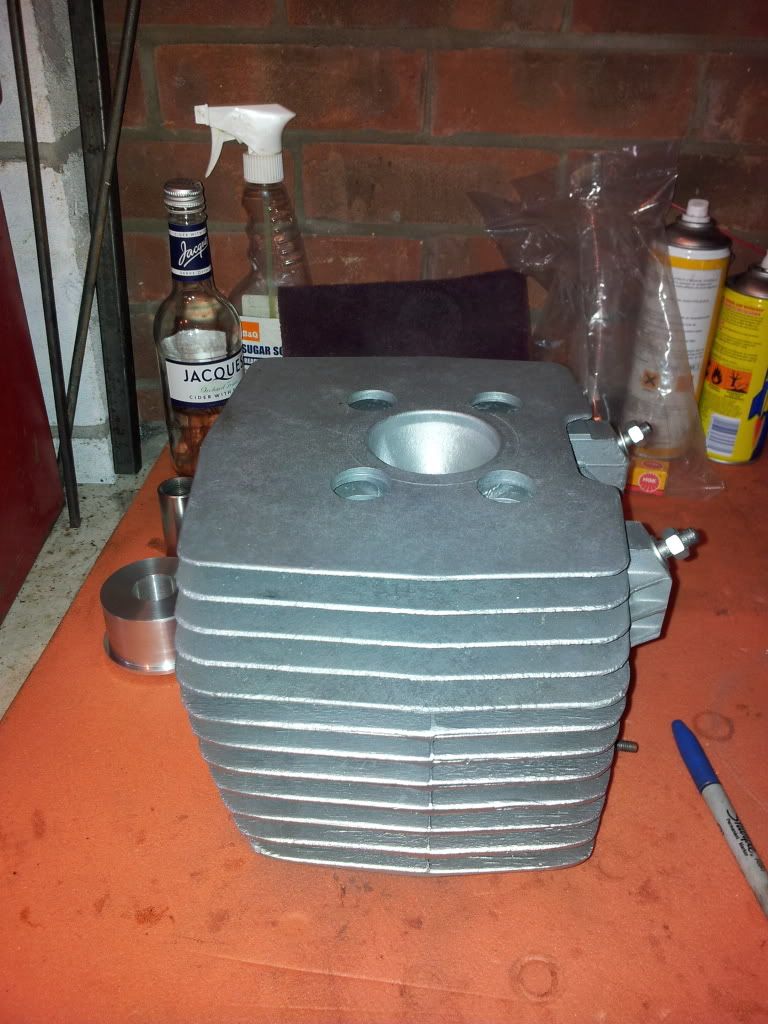

Beadblasted 


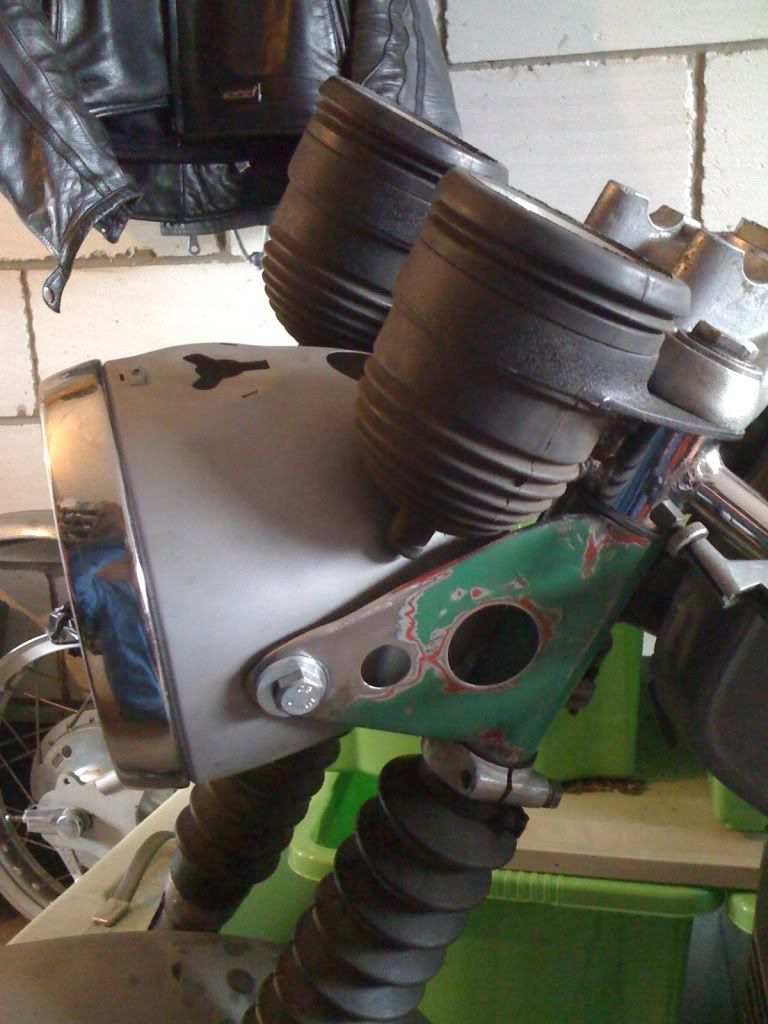
All bolted up, just align bored the inlet manifold/spacer and gaskets for that extra 0.0000005mph!


Won best 'found' in 'found & fixed' in classic bike magazine

I just won best found in 'found & fixed' in july's classic bike magazine so thats another £20 in VMCC vouchers to knock off the budget haha

Getting there, just rearsets, front indicators and battery carrier to go now, then its strip prep and paint Had to mount indicators as its just on the cusp of the 84 ruling but their removable ;)

Bought an expansion chamber exhaust from germany, delivered all in for £39 !! Suits it perfectly


Bit more of an update, not been on here much as spending all my spare time in the garage working to my self imposed deadline of a run down saff to a mates rod doo, which reminds me to apply for the V5 so I can tax the bloody thing! All being well if I get some hard to find parts through in time were on schedule but it might be in bare metal lol Nearly finished the fab work just waiting for my expansion chamber exhaust to arrive from germany so I can start on the rearset footpegs then thats all the fab work done, then its small engine rebuild, wiring, and some welding I cant do till its all stripped down to bare frame, not much then lol Oh and im  waiting for my headlamp shell to be mirror coated using the same material as missile guided systems use, it going to be worth twice as much as the whole bike once thats done hahah but at least it will save me £25 for a decent second hand one :D Some quick pics taken today, may not seem like it but the only part that hasnt been modified in some way is the tank everything else has been lightened, deleted or modified, the front mudguard alone has been 6 pieces spliced together to get the right look and get rid of some rot, the headlight sits 8 inches lower along with ally custom mount clock brackets welded up, clip ons in place of the handlebars as you can see by the top yolk, headlight is going to house all the electrics with no outside visible mounting points for it all, made a rear hugger that goes up and down with the braced swingarm, seat is obvious a one off fab, airbox which weighs a tonne deleted, kickstart modded to clear the rearsets when fabbed up, rear  brake mech is a nightmare refab as it crosses over right to left, wont bore you any longer with all the small bits lol


Engine sourced

More progress, managed to source a hens teeth Supa 5 engine which is a 250cc 5 speed item, my frame is registered as a Supa five so was well chuffed with that fund stands me now at £223 including a lot of missing bits and new bearings throughout, clips ons are a present off a good mate, he took them off a bike years ago and have been in his loft ever since, (cheers Geffo!) he tried to use them in the 80's again but couldnt get them to fit any of his bikes, slipped on perfect, chuffed to bits


Dry build 1 of .......

Did a quick dry build today, feels comfy not bad for 6' 4" lol


But he thinks it going to be his when he can put his foot down lol